Scenario: You are blocked or locked out and can’t get back in
Scenario: You are receiving loads of lockout emails even though you have hidden your login page
Scenario: MySQL server has gone away
Scenario: You are seeing a 403 forbidden error when you get auto-logged out of WordPress in some cases
Scenario: The plugin is showing the server or internal IP addresses instead of the visitor addresses.
Scenario: You are blocked or locked out and can’t get back in
Do the following steps if you for some reason cannot get log back into your WordPress site due to the AIOWPS plugin:
1) use CPANEL file manager (or FTP) and temporarily rename this plugin’s folder.
eg, rename from
all-in-one-wp-security-and-firewall
to
tmp-all-in-one-wp-security-and-firewall
2) Get your currently active .htaccess file and remove all code which is between and including the following tags:
# BEGIN All In One WP Security
# END All In One WP Security
3) Log into your site using the standard login link – ie, wp-login.php
4) Using your cpanel or FTP rename the folder back to all-in-one-wp-security-and-firewall.
5) Once logged in you can disable or re-configure the feature(s) which were giving you problems
Scenario: You are receiving loads of lockout emails even though you have hidden your login page
If you find that even though you’ve hidden your login page you are surprised to see that you are still getting a bunch of continuous lockout event emails don’t panic! The chances are that the bad guys have NOT discovered your hidden login page.
What is most likely happening is that the bad guys, or more specifically automated scripts they have written, are continuously targeting your xmlrpc.php file which is part of the standard core WordPress installation.
XMLRPC is used by some plugins and apps such as JetPack and the WordPress app.
If you’re certain that your site does not need XMLRPC and is hosted on an Apache server, then you can block access to the xmlrpc.php file by enabling the following AIOWPS feature:
From your WordPress admin panel, go to:
WP Security >> Firewall >> Basic Firewall Rules
In the section called “WordPress XMLRPC & Pingback Vulnerability Protection” check the box called “Completely Block Access To XMLRPC“.
The above works only for Apache-type servers. If you have an nginx server there are manual rules you can insert into the nginx.conf file to do the equivalent of what I described above (just do a Google search).
Alternative method:
(This is independent of type of webserver)
If you purely want to use PHP code to block XMLRPC requests then copy and paste the following code into your theme’s functions.php file:
add_action('init', 'block_xmlrpc_requests');
function block_xmlrpc_requests(){
	$req_string = $_SERVER['REQUEST_URI'];
	if(!empty($req_string) && strpos($req_string, 'xmlrpc.php') !== false){
		wp_redirect('http://127.0.0.1');
		exit;
	}
}
Scenario: The File change detection feature continuously gives a mysql warning when trying to perform a scan.
If you are getting the following warning when trying to a file change detection scan:
PHP Warning: mysqli_query(): MySQL server has gone away in ....wp-includes\wp-db.php on line xxxx
This may be caused when you have a large site with many files in your system. One thing you can try which may fix the issue is to increase the following configuration item which can be found in the my.ini file:
max_allowed_packet
(Note: the default may be set to 1M. Try increasing this to something larger such 10M or 20M)
Scenario: You are seeing a 403 forbidden error when auto-logged out in some cases.
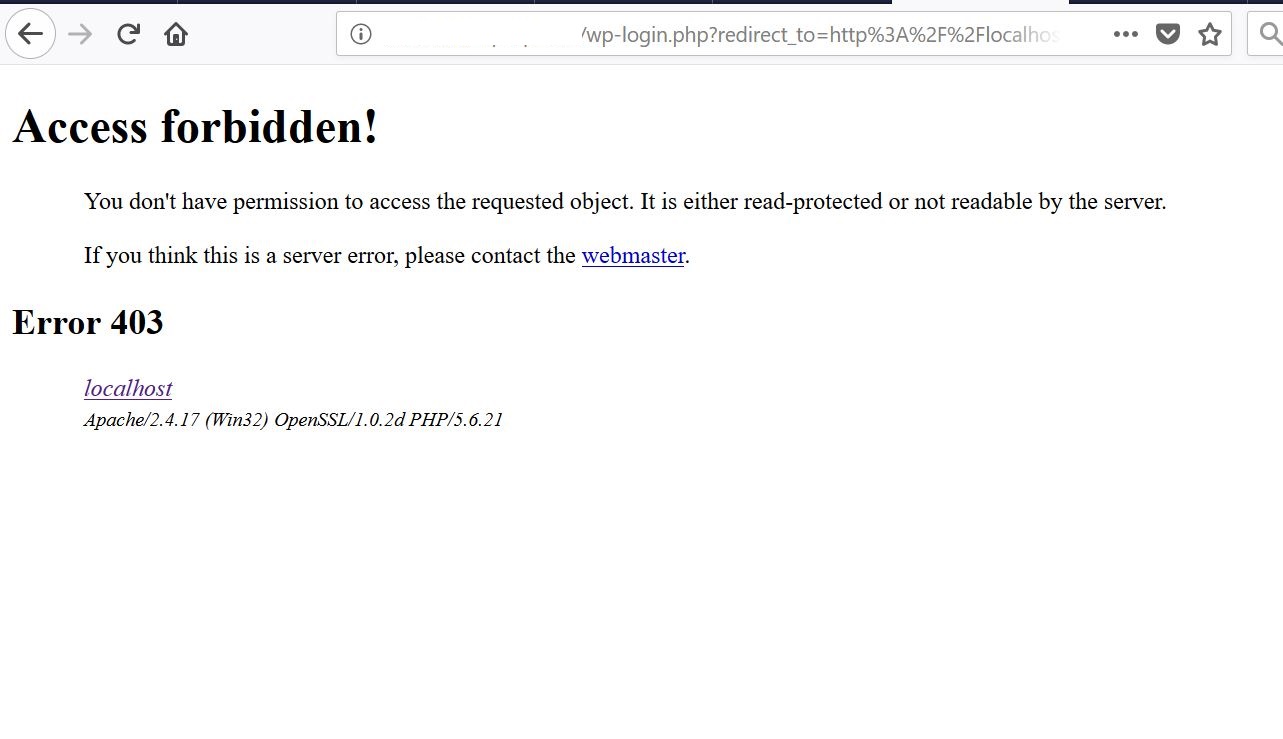
When you have been auto-logged logged out you see the following error:

The above will usually be caused by one of the firewall rules because one of strings in the URL is firing the rule.
Example:
You have an xampp localhost test site and also have the “Deny Bad Query Strings” firewall rule active. Your login time has expired and the redirect URL looks like the following:
http://localhost/test-site/wp-login.php?redirect_to=http%3A%2F%2Flocalhost%2Ftest-site%2Fwp-admin%2Fadmin.php%3Fpage%3Daiowpsec_spam&reauth=1
This is a false-positive and is being caused by the fact that the URL contains a query parameter which has a string that one of the firewall rules is detecting as forbidden.
(NOTE: the query parameters consist of all of the parts after the “?” character)
In this case the “Deny Bad Query Strings” is detecting the string “localhost“.
This is simply a false positive and you can ignore the 403 message.
Solution: To get back into your site simply remove the query parameters from the URL, ie, all of the portion starting from the following to the end of the url string:
?redirect_to……..
So from the example above you would just enter the following in your browser to log back in:
http://localhost/test-site/wp-login.php
(NOTE: If you have renamed your login page you would enter your login URL with the secret login slug)
Scenario: The plugin is showing the server or internal IP addresses instead of the visitor addresses.
If your host provider has a setup whereby your web server is behind some kind of load balancer or perhaps you are using CloudFlare then you might see that this plugin is showing incorrect visitor IP addresses such as internal addresses, server address or CloudFlare addresses etc
This is because the plugin uses the $_SERVER['REMOTE_ADDR'] by default to identify the real visitor IP address but your hosting setup may have different behaviour.
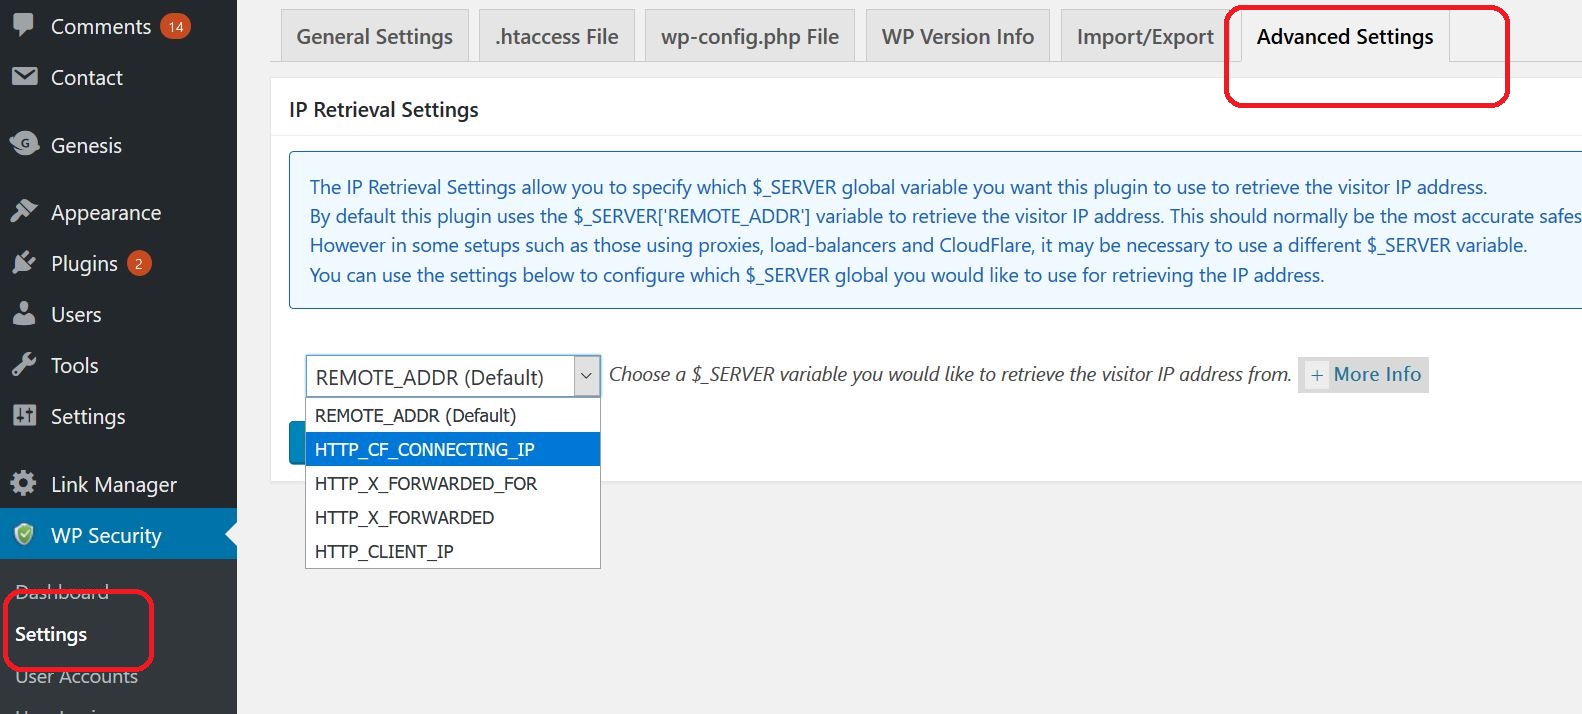
Solution: Try adjusting the following setting:

For example if you are using CloudFlare you should choose “HTTP_CF_CONNECTNG_IP”.
In other cases “HTTP_X_FORWARDED_FOR” usually contains the correct visitor IP address.
Try each of the settings to see which works for your setup.
If after trying all of the above settings you are still finding that you are not seeing the real IP address then please contact your host provider and ask them where in the $_SERVER global variable do they set the real visitor IP address.